Sorry for my newness here, but I have loved making Chinese sponge cake (also called "Gai Don Go") for quite some time and have actually been working with using this same recipe (not in the same quantity).
But the reason I stumbled across this was because I was looking into checking what else I might be able to do with sponges.
So with this recipe in mind I actually substituted a bit and played around with it.
To the measurements of a regular 8" round which yields approximately 2 cakes in my working with the recipe here's the formula.
2 cups softasilk brand cake flour (though I have been just fine working with gold medal all purpose flour)
1.5 cups sugar (in the directions I will explain about how to work with this, also I have been using C&H bakers sugar)
0.5 cups oil (canola or coconut will work well)
0.75 teaspoons cream of tartar
1 Cup water
8 eggs separated
0.75 teaspoon vanilla extract (I've used almond, vanilla, and lemon extracts with all the same result. If there's a flavor profile preferred and there's an extract, you can use that.
Okay so the directions in your cake and mine are as followed. There will be the directions stated from the recipe as stated on the site, and then my own modifications and excerpts.:
Heat water and dissolved sugar. Let cool.
Heat water at low heat with half the sugar. So in this case the 0.75 cups. Of course letting the liquid cool.
Mix yolk into sugar water.
This stays the same.
Slowly add flour into the mixture.
Since I'm working with all purpose flour, I sift it twice before slowly adding it.
With the original softasilk flour, I would sift once to be safe of any clumping
Blend in oil and extract.
For here I only do the oil.
In a large bowl, beat egg whites until peaks are stiff. Add cream of tartar.
Note: in your quantity, you would need to have an industrial size mixer at hand and a very large bowl.
But in my smaller version, I have been using a glass bowl that holds just a bit over 2 quarts. With barely enough room to work with after we combine the whole thing together.
So I suggest a 4 quart bowl to be safe with above recipe.
Back to my modification.
So I start by getting the egg whites slightly frothy. Then add the extract of choice and the cream of tartar. Then work my way into soft peaks. At this point, I slowly incorporate the remaining sugar, while whisking away violently by hand (for ease a hand mixer would be appropriate) right up until stiff peaks.
Fold batter from above into egg whites.
Here's where it gets a little problematic. As above, suggestions say to incorporate the fold in layers as to not let the whites break down. Don't worry, the first time I did this recipe to the tee, and it came out alright; but as stated it starts to deflate the egg whites when you do it all at once, and it makes the cake slightly dense.
So here are my calculated risky folding when I got acclimated. I would take about a third of the egg white fluff, with a spatula, and fold it in using a whisk. Once that got incorporated, I would take half the remaining white and then i would do the same again until it was incorporated. At this point the batter starts to turn from the yellow caramelized color to more of a translucent cloud.
Then I would fold the remaining last bit of whites into the batter using a rubber spatula. Turning our cake mixture into this gigantic cloud in the bowl.
Pour combined batter into an UNGREASED aluminum cake pan (do NOT use a non-stick pan!).
In my case of using an 8" round, I am using a dark stainless steel pan, in which our now super fluffy cake batter would go into.
I have come to find that this recipe on my scale fills the pan (goes to about 2/3rds to 3/4ths of the pan), as well as 12 cupcake tin pockets.
Bake at 350 degrees for 45-60 minutes until done (when toothpick comes out clean).
This is almost the last step. But from just throwing it in the oven and letting the cake bake just as is, will create big pockets of air, which will deform the cake (which I have learned in my past.)
So as to before this step is thought of. I take a toothpick, and poke the middle of the cake all the way down to the bottom, and slowly make circular motions throughout the batter in the pan, until every inch is covered. I tend to take a good two minutes to thoroughly get any and all of the big pockets out of the cake, thus creating a bunch of smaller bubbles throughout. I really think of the sponge cake as a Japanese cheesecake at this point.
So onto putting it in the oven. I do suggest getting a baking casserole dish that our cake pan can fit in, and filling it with about a centimeter of water. Yay, Cake bath! Then letting it bake in such a manner like a cheesecake.
It does take about 40 to 55 minutes to bake in this case. If you have an oven with the interior lighting and peering window, I suggest at the 35 minute mark, keeping an eye on the cake. You will notice the cake does go over the top of the pan, but no worries, just means the last step of cooling upside down does not work. But at the time the top stars becoming a nice golden brown around the edge, is the time to check it with a toothpick.
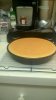
I have attached a picture of my cake actually for how it is after it has come out of the oven and at the point of having a clean toothpick. (For this one, I have used a lemon extract, and then had topped it with a lemon flavored 7-minute icing)
So now onto cooling the cake. Of course looking at the cake bulging out of the top, there is not a simple way to cool it upside down. So I left it upright for about a half an hour, on the cooling rack. Once it was still warm, but not too hot to handle, using a rubber spatula, I gently slide it between the cake and pan, to separate the edge, and due to the flexibility of the spatula, curve it slightly underneath, to sort of lift the bottom edge. Once I get the cake in a position of being able to remove the cake. Take wax paper to cover the top of the cake, and a solid surface to invert the pan for removal. Since we had separated the edges, it should come out nice and easy.
After this is done we can move it back onto the cooling rack with the wax paper to protect the top of the cake, cool I g it upside down like such, or even right side up cooling. It should take about 2 to 3 hours to cool the rest of the way before you top it.
On a side note the cupcake tin takes about 20 to 30 minutes until it comes to the same consistency, of baking with the cake bath.
Sorry I forgot to upload the picture of my cake cooling upside down.
But now I digress in my thought process. But in my humble experience with the literal same cake recipe, and modifications of my own self improvement on it. I suggest to stick to small batch as the recipe modified above, with however many tapered ( 8",9",10", or however sized you would care for) round pans.
For stability in transport it should need a few dowels involved, otherwise the cake is decently stable in its own, due to the bottom being slightly glutinous as a steamed cake.
And ways to ensure maximum quality of the overall cake is to plan accordingly. Always try and stick to a single supplier and brand for eggs, to ensure you are not just going into a potluck of different eggs from different brands and such, but plan for how many times you need to make the small batch, and get the number of eggs, plus some, just in case of egg separation a yolk explodes on you.
Make sure all ingredients are not past their expiration.
If you decide to use organics, go all organic or nothing organic. Or it will just not be properly organic.
Not quite sure of a naked 48 hours to have sitting around. But if you have a big enough cool storage unit/walk in cooler, as long as you take it out about an hour before icing it.
Also, my own recommendations for this style cake would be slicing fresh fruits (strawberries, kiwi, tangerines, etc...) for decor, and giving a nice light flavor.
Happy Baking!
")