Tears in dough!

Joined
Jun 22, 2017
Messages
4,067
Reaction score
2,081
Wow that’s an amazing response thank you so so much!

It’s so frustrating because the internet is full of conflicting information which makes it very difficult to know the correct method to use.

To be honest, I’ve been using trial and error approach.

I can absolutely see that there are crucial very intricate stages in any type of bread making and if just one of these strps is carried out incorrectly then the result is inadequate!

When I’m proofing my doughnuts the second time, they inflate to the point of deflating if they’re moved even slightly. Like they become very very delicate so it would be impossible to poke them.

The recipe that I use calls for instant yeast. The way I’ve been proofing the dough so far is to steam up my bathroom (there is no toilet in there) and make sure it’s warm.
I definitely need to invest in a room thermometer which I have attempted to do but I’m totally unsure of the brand which will yield the most accurate results as I think that this is something that I would need to spend a bit of extra cash on so that I’m not lumbered with a thermometer that isn’t reliable.

I’m really keen to achieve the nice puffing up result when I drop the doughnuts into the oil but they it just isn’t happening for me.

I am definitely going to order the book that you recommended tonight.

Dough based cooking is even more of a science then cake based! I definitely understand why the term master baker was coined as in many ways it is a very complicated and skilful area of cooking.

I am very much grateful for the advice you have offered me!

It’s very difficult to get hold of yeast Atm but I did manage to get some instant yeast. Any advice on how to use this more efficiently?

Thanks in advance! X


The cheapest I’ve seen Suas’ book is on Blackwell’s in the UK. They ship to the US. They deal in textbooks; the UK pound is worth more than the US dollar, so it’s cheaper to buy expensive things in the UK if the shipping is included in the price. I live in the US and have ordered from Blackwell, so they are ligit. Suas’ book usually lists for about $80 on the San Francisco Baking Institute’s website and sells for over $100 online. Suas is the founder of the San Francisco Baking Institute and partner in b. patisserie. Every baker in the US who is anyone has turned to Suas for help setting up their bakery; he is legend in baking. He literally wrote the book on baking. He is responsible for the whole artisan baking movement in the US. If not for him, Acme Bread would not have succeeded in large production. Americans would still be eating the horrible Wonder bread.

If your dough is collapsing when proofed, you are totally over proofed and out gassed. DDT!!! You have to control your finished dough temperature.

Getting better results with instant yeast:
  • DDT- we talked about this, I cannot emphasize this enough; controlling fermentation (yeast development) is dependent is on dough temperature
  • controlling the proofing temperature by setting up your oven as a proofing box; again, it’s about controlling the temperature of the dough. It’s more difficult to control the temperature of your kitchen, but easier to control your empty oven because its a small space.
  • Are you baking by weight? If not, I would recommend you do so. You can cramp as much as 155 g flour in a cup; but if a formula calls for 135 g flour, you will always use 135 g flour.
  • Use as little sugar in your dough as possible; yeast is a living organism that feeds on sugars (fructose and glucose). Instant yeast feeds on the starch, which is made up of a type of long chain glucose in the flour. When additional sugar is added to the dough, instant yeast just goes into a feeding frenzy and reproduces like mad. Eventually there’s so much yeast and not enough food source to sustain the yeast, and the yeast begins to die off. It also produces way too much gas, as you saw.
  • Reduce the amount of instant yeast a tad. Given you fast instant reproduces, you can use a bit less.

You don’t need a room thermometer, all you need is an instant read thermometer. Granted I finally purchased a Thermapen MK4 (yeah @Lee_C!) but for years I used a CDN brand, which is a common brand found in food service. Just turn it on and place on a neutral surface, like a plastic plate. It will give you the room temperature. I place it in the oven to get a reading when I am using the oven as a proof box.

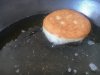
To transfer you doughnuts into the frying oil, the best method is cut squares of parchment paper. Place a doughnut on each paper square, and let them proof. When ready to fry, gently flip the doughnut, paper and all into the oil. the paper will release on its own. Then use thongs to lift the paper out of the oil.

 
Joined
Jun 22, 2017
Messages
4,067
Reaction score
2,081
and master baker isn’t just a term. To become a master baker, you have to three levels of certification: Certified Journey Baker; Certified Baker; Certified Master Baker. It takes a min. of 10 years to complete theses levels. After you complete these levels to be are certified, you must complete something like an additional 30 hrs of training, followed by an exam. The exam is in two parts, written and practical. Both must be passed by 75%. Its not cheap either. The master baker portion of the exam alone is like $750.
 
Joined
Apr 30, 2020
Messages
158
Reaction score
29
I have been cutting around my dough to drop the pieces into the oil, this is a definite must! Thanks

Yes it’s like the dough circles are so airy and light that they almost have no structure. Even touching them v slightly causes them to flatten!

I find knowing when the second proof is over so hard because there’s been times when I’ve fried them too soon, and this is evident because they inflate in the oil, and time’s when they’re over proofed which is evident from how delicate they become. Can you notice this from the second


The recipe calls for 600g of flour and 40g of sugar so I think that relatively speaking this is an OK amount..???

I’ve been going in blind so this book sounds like a must!

I’m a little nervous about keeping temperature within such a specific range as this may be pretty tough!

To summarise your advise so far;


Temperature is an extremely key factor!

Buy an instant read thermometer to monitor this,

Dry yeast is better than instant yeast

reduce the amount of instant yeast, the recipe calls for 11g, how much should I reduce it to?

Don’t overdo the second proof,

The second proof is over when you can press the doughnuts..????? Not clear on this

Don’t overdo it with the sugar as this causes the yeast to enter into a feeding ‘frenzy.’

As well as some calculations that I’ll have to go through once I have a thermometer.

The recipe I use says that the second proof should not result in doughnuts that are risen by more than 50%, do you agree?

Thanks again, this is all very interesting stuff :)
 
Joined
Jun 22, 2017
Messages
4,067
Reaction score
2,081
so the baker’s percentages are

flour 100%
instant yeast 1.8%
sugar 6.6%

You can drop your yeast down to about 1%, so about 6g.

The sugar is fine at 6.6%.

Your real problem is regulating the dough temperature. This what causes amateur bakers the most problem—time and temperature. Not their fault though because they are not taught baking science. And I blame professional bakers. They write cookbook and dumb them down. Walk into any culinary school or commercial bakery and they all work to DDT. But does anyone mention a word about it in a cookbook? Nope. You think any commercial mixer won’t melt butter, but every cookbook states to cream butter and sugar using “room temperature butter”. Never mind that there’s no such reading as room temperature on a thermometer. They use Butter that’s at least 65°F or colder because butter plasticity and because the mixer will melt the butter. But when the same chefs write their cookbooks, they instruct home bakers to use room temperature butter.

It seems like a daunting task to regulate the dough temperature right now only because its something you haven’t done before. But once you start incorporating the tecniques into your baking, it becomes seccond nature. I had a baker say to me here recently he’s spent his entire career working to DDT 75°F. It’s ingrained in him. Take your room temp; your flour temp; add on your friction and any pre-ferment; Multiply the number of the factors by 75. Subtract the total TTF and he has his required water temperature. When you do something repetitively, its simple. But I feel you, the first time I saw DDT, I freaked out. Now I don’t even look at the steps.

BTW, those friction factors are for home bakers, not for commercial machines.
 
Joined
Feb 12, 2020
Messages
257
Reaction score
121
If I'm allowed to chime in here about the Michel Suas text, I've also read two other very popular pastry textbooks - Professional Baking by Wayne Gisslen, and The Professional Pastry Chef by Bo Friberg - and Suas' textbook is by far the most detailed out of the three. It goes much more in-depth about the science behind baking.

For example, the cake mixing chapter has a section on how batter temperature, pH, and specific gravity affect the finished product and how to control for them, which the other two texts don't get into at all. Admittedly that information isn't actually much of use for an amateur home baker like me since there's no way I'd be measuring those things or controlling for them, but it's just an example to show the level of detail in the textbook.

Also, from what I've heard from others, the textbook's main strength is really from it's bread section as opposed to the pastry section, which I've actually skipped for now since I'm still focusing on pastries before getting into bread making. So the value of the information there may be even better than what I've found so far in my experience!
 
Joined
Jun 22, 2017
Messages
4,067
Reaction score
2,081
I don’t know if this will help. They are croissants, but the texture will be similar with a doughnut or any yeast dough. When you press gently, underproofed dough will spring back. Proofed and ready to bake will hold an imprint. Over-proof will cave in and when it‘s gassed out, will collapse. What happens in over proofing is that too much carbon dioxide has been produce; that is now exerting too much pressure on the dough, more than it can support. The cells membranes then begin to tear. When enough tear, the dough collapses. Since the dough is already expanded to its limit, it won’t rise or expand much in frying or baking. In fact, it usually collapses because its already damaged before its baked or fried.

Traditional thinking is you cannot rescue over proofed dough. But, the Modernist Cuisine says you can rescue some bread doughs. I can’t say as I have never tried it.

2107CE46-FCFA-42BA-BC8D-BC304C5CEE48.jpeg
 
Joined
Apr 30, 2020
Messages
158
Reaction score
29
You guys are all super cool

I’m literally just starting out here so all of thIs is quite complicated for me but I hope that in time as you say it’ll become second nature.

how do I Actually maintain the correct temperature in my oven?

Also, began this process using fresh yeast in the doughnuts and I must admit I have noticed a difference in texture since switching to dried, is this just psychological or would you agree?

I feel that fresh yeast adds an extra level of hydration to the dough which dried yeast obviously doesn’t.

When I’m checking my fresh yeast, what would be the most appropriate temperate for the liquid? I use milk.

The croissant picture is very helpful! I can definitely SEE the science that you stated above in my overproofed doughnuts because they have a sort of ‘empty’ excessively airy look so that all makes a lot of sense.

I’m going to sit down with a pen and paper and try and go through these calculations.

Also, @Cahoot, thanks for your opinion! It seems that book is definitely the best option then.

And it’s great that you’re skipping the bread section and focusing on ONE thing at a time. If there’s one thing I’ve learned, you Focus on one thing and you do it well! There’s an old French proverb that says the fox who chased two hares catches none.
This is especially true when it comes to breads and pastries as these are complicated areas of baking.

Does the 8-10 minute kneading rule apply irrespective of the amount of flour you’re using?

Will be making another batch today so I’ll definitely let you guys know how it goes! When I set my mind on something I’m relentless , my soul won’t relax until these doughnuts are perfection!!
 
Joined
Apr 30, 2020
Messages
158
Reaction score
29
My main worry is temperature maintaining.
so I tried to activate some fresh yeast,sugar or no sugar? And the temperature on the thermometer dropped to below 30 when I added it into the milk, at this point I’m stuck as I can’t heaT the mixture!
 
Joined
Apr 30, 2020
Messages
158
Reaction score
29
Sorry forgot to add.. After 10 minutes of kneading the dough was soft and plump but didn’t spring back when pressed, only very slightly.
 
Joined
Jun 22, 2017
Messages
4,067
Reaction score
2,081
The choice of yeast makes no difference. People who say fresh yeast is better cannot back that claim with any scientific data. In fact, there’s some benefit to dry yeast.


The process to produce desiccated (dry) yeast kills about 25% of the yeast. Dead yeast cells produces glutathione. Glutathione inhibits the develop of gluten. In small quantities it acts as a dough conditioner. So dry active yeast acts as a natural dough conditioner. In fact glutathione is produced commercially as a dough conditioner. (See the link it discuss glutathione as a dough conditioner).


Now that said, what does that tell about using dry yeast? Think about that for a minute...if dead yeast produces glutathione, then you want to minimize yeast death because too much glutathione will make a weak dough. So if using dry yeast, and you plan to freeze and thaw dough, that will cause more yeast to die in that dough. So if you want to prepare bake ahead rolls or bread for the holidays or a busy family event, you have about 2 - 3 weeks of freezer lead time at most before the quality of your dough deteriorates.


Just another reason to know your baking science. And another reason to ignore what you read on the internet.


https://www.lallemand.com/BakerYeastNA/eng/PDFs/LBU PDF FILES/1_7REDUC.PDF


Cake or fresh yeast must also be handled differently. I mentioned it is a living organism. As such, it feeds on sugars. Fresh yeast is very sensitive to sugar and salt and temperature. And since the liquid temperature recommendations for fresh yeast is 90°F-95°F (32°C-35°C) and the DDT for doughnut dough is 78°F-82°F (25.6°C-27.8°C), fresh yeast is not a good choice. You can go below these temperatures, but these are the recommendations of the manufacturer for optimal reproduction. Lower temperature just means longer rise times.


There’s also a very precise process for dissolving fresh yeast in liquid. And fresh yeast should not come in direct contact with sugar or salt. So you have to know the rules to work with fresh yeast. I think Americans get caught up in the mystic of fresh yeast since it’s uncommon here.


=======================================


Oven as proofing box: If you have an oven light just turn it on and that will help to heat your oven. Ovens are insulated so that little light bulb in your oven will warm it and the insulation in the oven will hold the heat.


Place the rack in the lower 2/3 of the oven so whatever your proofing is it too close to the lightbulb.


Just routinely check the temperature in the oven with an instant read thermometer.


======================================


Kneading: Insofar as kneading the dough and setting the timer, I only suggest you use a timer so you stop over-kneading the dough. Right now you don’t know what to feel and look for in properly kneaded dough either. But right now you are over-kneading. When you cut the doughnuts, they are shrinking up. That is excessive gluten. Plus you doughnuts are collapsing during the final proofing. So the cell membranes are completely destroyed. You need to back off the kneading. Start paying attention to the look and feel of the dough. It’s good that you notice what it looked like after 10 minutes. Keep a notebook. You are not going to get this right the first time. May be not the third time. Keep noting how the dough feels and look each try. This is a work in progress to learn how to knead and what to look and feel for. There are some things you have to learn through experience. You have to touch and feel the dough. One thing Americans are so loathe to do is work with their hands. But it is an important part of the learning process. That you do not have a stand mixer is really a blessing.


Suas’ book will discuss gluten development—and the windowpane test. But more than anything you need to learn to feel the dough in hand. And every batch of dough It’s going to be a little bit different because flour varies in how it absorbs moisture. Also different type of breads and doughs are different; doughnuts are different from bread; enriched doughs are different from bread. This is a journey. I am still on my journey and I see no end destination. I take the paths as they come along.


@Cahoot is correct that Suas’ Book is not necessarily practical for the home baker in all its applications. What is critical is understanding the science of baking. If the proper science in mixing and baking is not applied throughout the process, then it does not matter if you weighed ingredients accurately or used quality ingredients. Nothing will fix over-developed gluten and gassed out dough. So the science is really important.


When I started, I was totally overwhelmed and confused. Today I bake using my own formulas, with the exception of bread. I’m still not confident in my bread. But all pastry is my own. I am totally confident in my pastry. But I am going to change that with bread. I’ve been doing more bread classes this past year. When this lockdown is lifted, I am going to sign up for more bread classes. I live in the wine country, so Suas SFBI is closes by. SFBI offers 5 day intensives which I prefer over 2-day blocks.


================================================


Here’s the guidelines for adding fresh yeast to doughs


NOTE: If the ratio of sugar to flour is more that 44%, then you should consider one of two options:


  • Additional yeast
  • Switching to an osmotolerant yeast


Adding cake yeast to dry ingredients:


  • Crumble cake yeast over dry ingredients
  • Use liquids 90°F-95°F (32°C-35°C)
  • Cake yeast activity may decrease if placed in direct contact with salt or sugar


The liquid is really warm; most DDT is 75°F - 80°F; so this is another consideration with fresh yeast. Again, you can go below these temperatures, it just means longer rise times.


Dissolving cake yeast in liquid before using:


  • Dissolve 1 teaspoon sugar in 113 mL liquid 90°F-95°F (32°C-35°C)
  • It is important that the sugar is dissolved because yeast is living organism. It feeds by absorbing nutrients through its cell wall. The process requires osmotic pressure. If there’s too much salt or sugar in its environment reverse osmosis happens. It impairs the ability to feed. And if there’s too much it can in fact kill the yeast because it draw the plasma out of the cell wall.
  • add crumbled cake yeast to dissolved sugar solution
  • Let the just stand 5 to 10 minutes until it begins to foam vigorously
  • Decrease 113 ml of liquid from the rest of the recipe to adjust for the liquid used to dissolve the yeast.
  • Add the yeast to the recipe


When adding additional liquid, you can adjust the temperature of remaining liquid to ensure DDT.
 
Joined
Apr 30, 2020
Messages
158
Reaction score
29
Great thanks!!!
This is finished product! Still a bit flatter then I would like!
How is the structure? Also, I only get a white ring around the doughnut like half way round.
 

Attachments

  • 00B26D17-582C-4592-A4F9-19A43212E759.jpeg
    00B26D17-582C-4592-A4F9-19A43212E759.jpeg
    91.6 KB · Views: 151
Joined
Apr 30, 2020
Messages
158
Reaction score
29
One thing that I really confusing me is, how do I regulate dough temperature? I don’t have a room thermometer and if I use my oven I can check the temp but if it’s off what do I do to bring it to range?
 
Joined
Apr 30, 2020
Messages
158
Reaction score
29
Ok so I made those doughnuts from your recommended recipe! The texture is UNREAL thank you so much!!!
A few issues that I encountered though with regards to my own method.. I could see a big bubble on the side of a few of the doughnuts, too soon to fry?

Also, some of the doughnuts are flatter than others... I’m sure we’ve covered this but there’s so much up there I’m not 100% sure. My brain is tired .


The 10 minutes kneading is definitely adequate!! I’ve stopped kneading now at 10 mins and I agree that any longer is just unnecessary.
 

Attachments

  • C96D5FEF-E956-4C3D-9F94-CB87C989D5DF.jpeg
    C96D5FEF-E956-4C3D-9F94-CB87C989D5DF.jpeg
    110.6 KB · Views: 179
  • 28724B88-7B55-4FEB-9141-281AA5C86C70.jpeg
    28724B88-7B55-4FEB-9141-281AA5C86C70.jpeg
    159 KB · Views: 183
Joined
Jun 22, 2017
Messages
4,067
Reaction score
2,081
Well hey!!! Where’s the coffee? Those look like some delicious doughnuts!!! Wow! You did great!!


Regarding regulating oven temp: if it gets a little too warm just open the oven door. Professional bakeries have temperature controlled proofers. Unfortunately home bakers have to wing it with the oven. There’s a company that makes a small home proof box, but it’s expensive. Brod and Taylor.


The bubbles: that’s blistering. Usually that’s caused by slightly cold dough or under proofed. You mentioned the donuts were a little flat. So you might have been a little under proofed.


This is a troubleshooting guide from a company that make commercial mixes. But most of the information is applicable whether you’re making donuts at home or in a commercial kitchen. if you have apple, you can hit the share button and copy it to your Books as a PDF. I don’t know how to save it if you have a PC.


Yes with the needing wants you make a few batches of dough you’ll get the feel for what is gluten develop. Don’t get hung up on the time, make sure you look and feel it. It’s important you understand what the dough looks and like and feels like when it’s ready.


But really congratulations you’ve made tremendous progress!!!


https://www.bakenjoy.com/wp-content/uploads/Donut-Trouble-Shooting-Guide.pdf


I have to say you and @Cahoot are two of the most dedicated bakers here. You both are making excellent progress in such short time.
 
Joined
Feb 12, 2020
Messages
257
Reaction score
121
@LamsMekk Your doughnuts look amazing!! I have to bookmark this thread for future use, there's so much good information and troubleshooting in here. Doughnuts are honestly one of my favourite foods, and when I start working with yeasted doughs I'm certain that I'll appreciate having this thread to reference.
 
Joined
Feb 12, 2020
Messages
257
Reaction score
121
If anyone's interested, although they're not donuts, but I thought Bruno Albouze's recent croissant videos were nice examples of techniques that @Norcalbaker59 was talking about, namely not using any flour for the kneading process, and giving the DDT. Of course they don't go as in-depth as you may find from text sources, but I don't know many good baking & pastry YouTube channels, especially one that's as popular as his.

 
Joined
Jun 22, 2017
Messages
4,067
Reaction score
2,081
He uses the French kneading technique called fraisage. It’s effective to incorporate butter into a dough, so used when making an enriched dough like brioche, or pie crust.

I would take exception with is the amount of flour he uses on the counter for the lamination process. When I was taught to laminate we weren’t even allowed to have a bowl of flour. The instructor kept a tiny little bowl of flour and if we overheated our dough he came around and flicked a pinch of flour on the counter. And when I say a pinch I’m talking maybe 10g at most.
Additional flour dries out the dough because flour is hygroscopic. It will make the dough tough and chewy.

When the gluten is relaxed, the butter is pliable, and the dough chilled, you should be able to roll the dough out without it sticking to the counter. When you overheat the dough, it will begin to stick. If you overwork it and develop too much gluten, it’s going to start springing back. And once it starts springing back, you end up stretching it rather than rolling it. Stretching the dough breaks the butter between the layers.
This video demonstrates the proper use of flour in lamination. And the rolling technique she uses is also very good. The gentle tapping of dough the spread it out before rolling. Although I think she taps a little bit too hard, because you can break the butter if you tap too hard. I use that same technique for my piecrust as well.

If you look at the interior of her croissant you’ll see she has a really nice honeycomb structure. That’s what you’re striving for in your lamination. That’s honeycomb structure is a good indicator the butter has rolled out between the layers of dough.
Also note how she does not put the egg wash on the tops, not on the sides of the layers. Her croissants are much rounder and fluffier. That’s the proper way to egg wash a croissant. If you egg wash the whole thing including the sides of the layers, you will fuse them and end up with a flatter croissant.

She also puts a very hard bake on the croissants. That’s the way a croissant should be baked.


If you look at Bruno’s you’ll see his croissant is flatter and his interior is more fused. It’s also not as rich in color. He makes more of an American style croissant.


https://buttermilkpantry.wordpress.com/2019/07/06/how-to-make-croissants/


This is a croissant made by Du Pain et de Idees, considered by many to be one of the best bakeries in Paris. I’ve only been to France once, but I would say this has the hallmarks the French croissant. Stout and plump in the middle; distinct layers; dark rich color.
368AA5E2-B935-4D0B-A262-719039F8E594.jpeg
 
Joined
Feb 12, 2020
Messages
257
Reaction score
121
I'll probably try chilling my doughs in the freezer instead of the refrigerator between turns. I've seen people recommend against it, but as long as you make sure it's only there for <30 minutes I don't see why not do so to make the lamination process that much quicker. I think an issue on my end is that even a one or two hour chill in the fridge doesn't leave the dough quite cold enough, requiring more flour to roll. And leaving it for longer gets in the way of your schedule when you planned on doing all the turns that day.

I've also seen the technique of pressing the dough before rolling. I'll admit I may be tapping too hard, if even the person in the video could be gentler.

The egg wash is a good point. I didn't even think about it, but it'd be such a shame to go through all that work only to fuse together your layers in the last step!
 
Joined
Jun 22, 2017
Messages
4,067
Reaction score
2,081
I'll probably try chilling my doughs in the freezer instead of the refrigerator between turns. I've seen people recommend against it, but as long as you make sure it's only there for <30 minutes I don't see why not do so to make the lamination process that much quicker. I think an issue on my end is that even a one or two hour chill in the fridge doesn't leave the dough quite cold enough, requiring more flour to roll. And leaving it for longer gets in the way of your schedule when you planned on doing all the turns that day.

I've also seen the technique of pressing the dough before rolling. I'll admit I may be tapping too hard, if even the person in the video could be gentler.

The egg wash is a good point. I didn't even think about it, but it'd be such a shame to go through all that work only to fuse together your layers in the last step!

Chilling the dough is not so much about the temperature of the dough as it is about relaxing the gluten. If you do not relax the gluten you cannot roll it out without stretching it. There’s a difference between rolling the dough and stretching the dough. If you stretch the dough, it tears and exposes the sticky inside. Then you fuse the layers.

You can leave the dough in the refrigerator longer than 30 minutes. I’ve left it in as long as an hour between turns. The lower temperature inhibits the development of the yeast (for croissants) so it won’t hurt it to be in the refrigerator for longer than 30 minutes. Yes it definitely adds to the time for lamination. But lamination is not a fast process.

Freezing the butter makes it brittle and that’s why it’s not recommended that you put it in the freezer.

You want the gluten relaxed and the butter chilled but not so cold that it becomes brittle.

In the class that I took, which was taught by a master baker who won a gold medal at the Coupe du Monde de la Boulangerie in Paris, he told us the butter would shatter because of the butterfat content. And it did. It all pretty predictable.
 

Ask a Question

Want to reply to this thread or ask your own question?

You'll need to choose a username for the site, which only take a couple of moments. After that, you can post your question and our members will help you out.

Ask a Question

Members online

No members online now.

Forum statistics

Threads
6,568
Messages
47,298
Members
5,506
Latest member
Pizzaman

Latest Threads

Top